Monday 28 November 2016

Blast From The Passed

Hi all

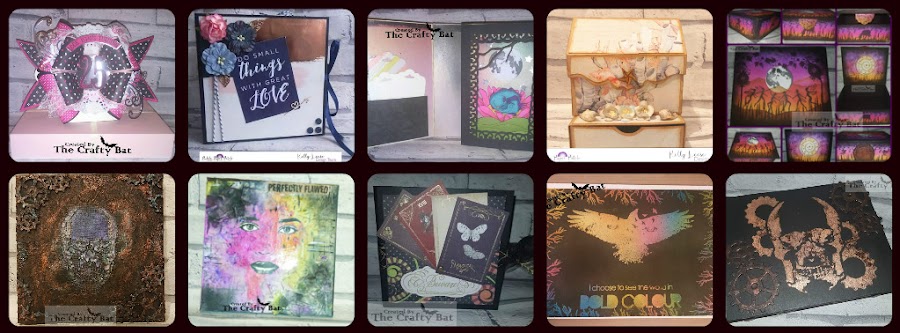
Today's post I thought I would share with you all some Blast From The Passed cards I made which all have Delicious Doodles Digi Images on which I have colours. Some of the are inspiration makes from when I was on the Design Team, I am slowly getting back into colouring in Digi's with my Promarkers I have actually missed doing it and I am hoping to incorporate them into some Mixed Media makes too :D 

Looking back on passed makes really does make me smile and shows how far I have come in my crafty journey I hope you enjoy looking at these as much as I did making them :) I will also link you too each Digi Stamp that is used in the makes.

The image used on this one which was coloured using Promarkers is called Fairy Fae and you can find her HERE

This one is called Gothic Fairy and can be found HERE


This is one of my favourite images from Delicious Doodles and is called Leather and Lace can be found HERE


Here we have Woodland Friends and you can find this one HERE


Here we have a lovely scenery called A Scottish Castle, can be found HERE


This one is a mix of two of the Delicious Doodles Digi's We have Beach Huts and Ice Cream Sundae. You can find the Beach Huts HERE


This is another of my favourite makes well of cause it has skulls lol, This one is a mix of a digi,sentiment and background paper by Delicious Doodles. The digi is called Skully Santa and can be found HERE

Here we have Woodland Friends again in a more of a Autumnal theme, you can find this dige HERE

This one is a mixture of Digi's and Background papers.. In this make we have the following: Gates Of Hell, Gravestone Scene, Horrorscope Capricorn and Pile Of Bones Backing.


This one we have a mixture of digi's and backing papers again: in this one I used the following: Pirate Polly, Treasure Map and Damask Background


This one I added in my all time favourite inspirational quote " Magic is believing in yourself, If you can do that you can make anything happen", The digi used on this piece is called Rose and Butterfly Frame.


This one was made using a template and includes a gift box on the side which includes four tea light candles. The digi used on this one is called Daffodil's and Butterfly Frame


And last one I wanted to share with you all is this one. The digi's used on this one are the following: Celtic Fairy, Celtic Crosses and Lucky Clover Corner


I hope you have enjoyed looking through some of my blast from the passed makes and they give you some inspiration if you would like to take a look at all the other digi stamps available from Delicious Doodles you can do so HERE.

I absolutely love Terri's work and I have seen her work changes through the years and she even has three colouring books out :O. I will admit there is a fair few of the new Digi's that I would love to add to my collection and will be doing as soon as I can.

I have linked all the Digi's that are available in her Etsy shop if they have not been linked I am sorry but can not find them in the shop. You can also take part in the monthly challenges which run over on the Delicious Doodles blog which can be found HERE.


I will be doing more Blast from the passed blog posts so keep your eyes open for that and for the new make posts.

Xx The Crafty Bat xX


Sunday 27 November 2016

New Crafty Goodies

Hi all

Today's post is all about some new craft materials I have had over the past few weeks and thought I would show you all :)

So a for a while now I have been very intrigued about the Gelli Plates, So I started to watch some demo's/tutorials on You Tube some being from Lavinia Stamps and was really impressed with what you can do with the Gelli Plate and even more surprised that you can use a number of different materials with it also.

After seeing what you can do I started to look around everything I needed and realised I would have to get things bit by bit UNTIL.... I was looking through Lavinia Stamps website and come across the Gelli Plate Starter Kit :O and looked at what you get in the kit at the fab price they have it all for including getting to choose ANY two of their stamps with the kit... I was SOLD!!!

It arrived SUPER quick and I was so excited... Here is the kit


As you can see it comes in an A4 storage box which alone are about £2 each.. Now I bet you are wondering what you get in the kit?? 
Well here we are everything you get 


Included in the starter kit is the following:
Brayer Roller 
Gelli Plate 3" x 5"
Stamp Block
Pack of Matt Card 
Set of Distress Inks 
Versafine Onyx Black 
Versafine Deep Lagoon
Perfect Pearls
Glitter 
and ANY 2 Lavinia Stamps (I chose Eden and Spiral Of Spells)

You can get the kit HERE

The next thing I got was some Adirondack Ink Pads which have been discontinued so can be very hard to get hold of... The reason why I wanted these inks is because I have noticed on the majority of the videos I watched on the Gelli Plate people were using these inks as they give the best coverage and print. The distress inks do also work but sometimes you will find you will get a droplet effect with them which I would prefer a cleaner finish. So I searched all over and found a couple places that sell them and then I checked Ebay and so glad I did someone was selling them on auction the seller had put up different listings some were for 4 some were for 3 inks. One of the sets I bid on I lost :( GUTTED!! BUT I did win two lots YAY!! and at BARGAIN prices. These are the colours I have so far.


Lastly this week I got some awesome new materials from my local craft centre to do more Mixed Media Art work :D EEEEKKK!!!


We have some Cosmic Shimmer Pixie Powders, Black Gesso, Stencil, Spatulas, Crackle Paste, Modelling Paste, White WOW Embossing Powder and of cause ANOTHER Lavinia Stamp :D 

I can not wait to get stuck in with all these beauties and share with you all what I have been up to I am mostly excited about getting stuck in with the Gelli Plate and the Cosmic Shimmer Pixie Powder's. I will of cause share with you all what I make and will of cause share my views on the Pixie Powders.

Xx The Crafty Bat xX

Wednesday 23 November 2016

Mixed Media Tags

Hi all
Today's post is something a bit different which i have been meaning do for a while now, I have been doing some Mixed Media Tags, I had so much fun doing these and plan on doing more.

Here are the three tags that I have completed so far.


As you can see they are all different, I am going to list what I used for each one and show you an individual picture for each one too.

So the first one I did was this one


For this tag I used the following:
Tim Holtz - Manila Tags
Brusho's
Dina Wakeley Stamp and Stencil Set - Silhouetted Essentials
Dylusions Stamp Set - Hearts Edge Set 
Inkylicious Stamps - Dancing In The Rain Set (one of the sentiments)
Distress Ink
Mini Mister
Blending Tool
Memento Ink 
Stampeeze

The next tag I did was this one and I have to admit i love how this one came out.


For this tag I did the monoprint technique for the background and used the following materials:

Tim Holtz - Manila Tag
Distress Inks
Mini Mister
Blending Mat
Heat Tool
Visible Image Stamp - Leave Your Fears 
WOW Embossing Powder - Gold 
Stampeeze 
Versamark Ink 
Memento Ink - Black 

The last tag I did using the monoprint technique was this one


For this tag I used the following materials:

Tim Holtz - Manila Tag
Blending Tool 
Distress Inks 
Mini Mister 
Blending Mat 
Heat Tool 
Stampeeze 
Lavinia Stamps - Fox 1 (Kernal), Moon, Fairy Lanterns, and a Tree
Inkylicious Stencil - Sun/Moon Valley and Mountain 
Babywipe 
Memento Ink - Black 
Versafine Ink 
Versamark
WOW Embossing Powder - Silver 

I hope you like what I have done on these tags and they give you some inspiration. I will definitely  be doing more mixed media tags as i really did enjoy bringing these to life and trying something new... I LOVE the Brusho's if you have not tried them I definitely recommend them.

Happy Crafting

Xx The Crafty Bat xX


Tuesday 15 November 2016

Magical Wonders

I have been wanting to try something different with a background for a while so today I finally got around to doing it... The first attempt I wasn't happy with so in the bin it went I'm sure many of us have done that lol.

I absolutely love how this turned out in the end, there is one stamp that I have had for a while that I have been wanting to use but could never think so after having a look around on Pinterest for some inspiration I had an idea in mind and have to admit it come together so much better than I could have hoped for.

Here we have Magical Wonder


I just love how the colours work so well together everything about this piece I LOVE!!, I decided to frame this piece and have to say framing it gave it that finishing touch


I only used THREE colours of distress inks for the background :O Yes only 3, I also used the splashed water effect on the background a little and the baby wipe technique for the moon. This has all been done on smooth white card.

Products Used:
Distress Inks
Stamps
Stencil
Baby Wipe
Water
Smooth White Card
Frame

I would like to enter this into the following challenges:
Artisitic Inspiration: Anything Goes 
Crafty Boots Challenges: Things with wings
Craft your passion challenges: Always Anything Goes 
Crafting With Attitude: Anything Goes 
613 Avenue Create: Anything Goes 
Creative Artiste: Anything Mixed Media Goes
Crafting When We Can: Circles

Xx The Crafty Bat xX

Comission Piece - Fairy Dreams

Today's post is to share with you a comission piece I have been working on for a customer who is also a close friend and fellow crafter.

This piece has been done to my friend's requirements, and when she first asked me to do a piece for her I was honoured to be asked, we chatted about it for a while and when she told me the details and the meaning behind this piece i couldn't believe because earlier on in the day I had been out to get some more stamps and this particular stamp is what she had described to me :O 

So I jotted down all the details and got to work on it, I was so nervous doing this for her with knowing how much it meant to her and because it is the first piece i have done for someone.

I present you Fairy Dreams


My friend also told me she would like it framed and the colour of frame she would like it in... So I was more than happy to frame it for her... Here it is all framed.


It looks stunning all framed I am absolutely over the moon with this piece, and even more proud that it will be going to Deb who is the amazing talented lady behind the Facebook page Fairy Crooklane... She makes fairies :O :O and they are stunning, I am also a proud owner of a few of Debbie's creations and highly recommend the go on go and take a peek.

Products used to make the above were:
Smooth White Card
Distress Inks
Colour Cloud Blend-able Inks
Stencils
Stamps
Frame
Blending Tool
Smoothie Eggs 

I hope you like this piece as much as I do and as much as I loved bringing it to life,I am also pleased to say Deb is very happy with it and this was her reaction to it "Omg!!! I love it ..speechless so beautiful hun thankyou thankyou so very much xx" - Having a reaction like this makes me so happy and proud.

Keep a look out for another new piece I have been working on.

Xx The Crafty Bat xX


Friday 4 November 2016

Dragon Eggs and Dragon Egg Lantern

Hi all and welcome back to my blog

Today's post is something a little different I have been wanting to try for a while now and finally got around to giving it a go.

I saw this first done on another blog that i follow regular and have to say I absolutely love Teresa's work, the effect of these is amazing and they look fantastic so many possibilities with them.

So here is my version of some Dragon Eggs and a Dragon Egg Lantern


I also inserted a light into the lantern so it can be lit up at night and it looks amazing when all lit up, I absolutely love making these and already have my fourth egg in the making, which of cause I shall share with you all as soon as it is finished as this one is a little something else.

Here is a few pictures of the lantern lit up


As you can see I even added in some fake grass and some lovely little daisy flowers, to give it the look of the Dragon Egg being in a next in an enchanted forest.

The black dragon egg has been given a glitter effect too which sets it off brilliantly, as I said before the possibilities are endless with these as you can do them in so many different ways, different sizes and so on. I am also hoping to sell some of them too which I am quite excited about as they are something different, also hoping to do one in a lovely chest which I will be decorating all by hand too so watch this space for my Dragon Eggs.

Lastly just to say a big Thank you to Teresa for her inspiration and for the advice and giving me that little push i needed to give this a go, I am so pleased I did and now I can not get enough of making them hehe.

Xx The Crafty Bat xX