Showing posts with label Made By Hand. Show all posts

Friday, 25 August 2017

The Promise 6x6 Mini Album

Hi all

Today I have something very different and new to share with you all, well it is not a new creation to make but is something new for me to make, A beautiful 6x6 mini album which I have made by hand.

I have really been looking forward to sharing this with you all and have been working on this beauty bit by bit in-between my other projects and Design Team projects.

So here it is The Promise 6x6 Mini Album


The cover of this beautiful mini album has embossed designer series paper on the front and back and a beautiful pearl flower trim down the edges.

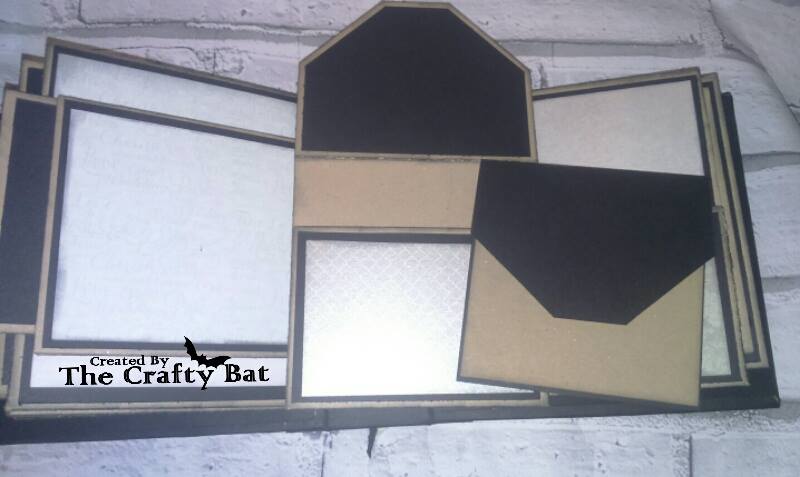
Now for the inside of the mini album


As you can see there is plenty of space on the pages to add photographs, journal-ling and much more each page has an insert which also has room for photographs and journal-ling.

This mini album has been made from scratch including the album cover, this has been made with a lot of love and care and I am so proud of this piece as It is my first ever mini album and most certainly will not be my last

This would make a perfect gift for a wedding due to the beautiful papers which have been used all the way through the album.

I hope you have enjoyed looking at this mini album as much as I have enjoyed bringing it to life and I hope it gives you lots of inspiration.

Kelly
Xx The Crafty Bat xX

Monday, 6 March 2017

Wedding Exploding Box Card

Hello all 

Welcome back to my blog, I have been busy in the background last few days planning and editing upcoming blog posts.

So today I have this very special exploding box card that I made for my cousin and her hubby this was something I wanted to make for such a long time and I finally got around to it and what a perfect occasion to do it for.

So here we have it, the first few pictures are the sides of the box on the outside and the lid of the box 


Now to show you the inside layers.. Here we have the first layer


Second Layer 


Third Layer 


Now to show you the centre piece of the exploding box 


Yes in the centre that is a mini cherubs figure which has been glued in

Lastly to show you how the box looks when your looking into it when all the sides are up 


And there we have it an extra special Wedding card and Gift in one. I did personalise this with their surname on the outside of the box panels and on the inside second layer their first names. All pieces on the layers of the box including the outer box are all cut on the Cricut machine. 

This really was a labour of love and I was chuffed with it. I am happy to report that the happy couple were over the moon with it too and it was shown off to all their friends and the family, my cousin even shed a few tears as she was so overwhelmed with it and it is on show in their home. They get asked regular who made it for them which is wonderful to hear.

I am hoping to make another very soon as I do have a great idea for one so keep your eyes open for that and for a pop up box card ;) 


Friday, 4 November 2016

Dragon Eggs and Dragon Egg Lantern

Hi all and welcome back to my blog

Today's post is something a little different I have been wanting to try for a while now and finally got around to giving it a go.

I saw this first done on another blog that i follow regular and have to say I absolutely love Teresa's work, the effect of these is amazing and they look fantastic so many possibilities with them.

So here is my version of some Dragon Eggs and a Dragon Egg Lantern


I also inserted a light into the lantern so it can be lit up at night and it looks amazing when all lit up, I absolutely love making these and already have my fourth egg in the making, which of cause I shall share with you all as soon as it is finished as this one is a little something else.

Here is a few pictures of the lantern lit up


As you can see I even added in some fake grass and some lovely little daisy flowers, to give it the look of the Dragon Egg being in a next in an enchanted forest.

The black dragon egg has been given a glitter effect too which sets it off brilliantly, as I said before the possibilities are endless with these as you can do them in so many different ways, different sizes and so on. I am also hoping to sell some of them too which I am quite excited about as they are something different, also hoping to do one in a lovely chest which I will be decorating all by hand too so watch this space for my Dragon Eggs.

Lastly just to say a big Thank you to Teresa for her inspiration and for the advice and giving me that little push i needed to give this a go, I am so pleased I did and now I can not get enough of making them hehe.

Xx The Crafty Bat xX